Saturday, 30 August 2014

Configure Corporate SSID using dot1.x authentication in Cisco WLC


Below is the procedure to create a new SSID using dot 1.x authentication. Dot1.x authentication generally used for coporate wireless network. where user is authenticated via AD and machine certificate.

Below are few EAP authentication methods.

EAP-LTS is the most secure dot1.x methode which require both machine and user authentication.

EAP-PEAP authenticate the client using credentials.

We assume that AAA server  is preconfigured as per the required.

Step 1. Go to Controller - > Interface  -> New to create new interface.


Step 2. Give the interface name and Vlan id and press APPLY.


Step 3. Provide the IP address/Netmask/Gateway to the interface. Also enter the VLAN id to which the ssid traffic will be mapped.

Map the logical interface to the physical port of the WLC.

DHCP server setting: - Enter WLC’s own address when the DHCP scope is created on WLC itself otherwise adds external DHCP server IP addresses.


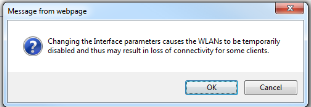
Step 4. Press APPLY to apply the interface settings. You will get the below warning which says that it can impact the connectivity to the SSID. Hence we should not change the interface setting during production hours.


Step 5. Once you press OK, you will get the list of interface created so far.


Step 6. Go to WLAN ->wlan -> From the scroll Tab on right side plan, select CREATE  NEW and press GO.


Step 7 Enter Profile name and SSID name and select the unique ID and press APPLY.


Step 8 Click the SSID ID to configure the other parameter of the SSID.

Select the interface and radio policy for the SSID.


Step 9 Go to Security -> Layer 2 security and chose WAP+WPA2( recommended) and its parameters.


Step 10. Select the appropriate AAA server.

Please refer to blog AAA server configuration in WLC In order to create new AAA.


Step 11. Enable the SSID, once the configuration is done.


Friday, 29 August 2014

Save/export CMD output to a file


Step 1. Go to Windows - > Run -> type CMD and press enter.

Step 2. Go to the directory where you want to save the file.

Use cd.. to exit from the folder. 

C:\Users\guest>cd..
C:\Users>
  
Use cd to go the directory.

C:\Users>cd guest
C:\Users\guest>


Step 3 Run the command cmd >capture.txt to make the new file with name CAPTURE.

Run the command for which you want to take ouput. Output will not be visible on the same CMD but it will be saved on the file i.e CAPTURE.
  

C:\Users\guest>cmd >capture.txt
ipconfig /all
ping 192.168.1.1


Step 4 Use EXIT keyword to terminate the session.

What is VXLAN Cisco ?


In legacy cisco environment we can only create 4094 Vlans as it only uses 12 bits Vlan id. If we talk about cloud infrastructure where there are many clients. 

Do we think 4094 vlan are sufficient? Answer is NO.

We certainly need a large number of vlan or similar technique to provide Layer 2 isolation. Cisco worked with vendors like VM, citrix etc. and developed a layer 2 technique known as VXLAN. It uses 24 segment id which comes out to be 16 million segments. This unique segment ID is called VXLAN network identifier(VNID).
VXLAN is a way to send Layer 2 traffic over L3 network. L3 can be shared by various other vendors and gives more flexibility from deployment prospective.

It is also known as MAC in UDP technique as it encapsulates Layer 2 frame in Layer 3 UDP packet.

Not only it divide the layer 2 network in large number of isolated network but it also enable us to use all the uplink called ECMP ( equal cost multipath) as it uses L3 routing table which is not possible is Legacy STP environment.

This technique is not available in legacy catalyst switches. Cisco nexus 9000,5672UP and 56128P are capable of VXLAN and most suitable product for large Datacenters and other cloud infrastructures.


Thursday, 28 August 2014

CISCO UCS - CIMC Usage and Installation


Cisco Integrated Management Console.

Usage : The Cisco rack server comes with video, Keyboard, mouse and usb ports to get the access of the console but to use these ports one need to have physical access of the UCS Rack server, which is not feasible all the times.

In order to access the server remotely, 2 CIMC ports given which can be connected to the network and later can be accessed via IP address on the browser.

Advantage of CIMC :
  •     Remote management of UCS Rack server to install/configure and upgrade
  •        The session can be recorded.
  •      Keyboard inputs can be provided to the server from the console.
  •   Setting up the CIMC IP address.
  •   For the very first time, to setup the CIMC you need to have physically connected a monitor,   keyboard and mouse with the console or the ports given behind the rack server.
  •       After connecting the above with the console, power on the server and wait for the screen to start.
  •        Press F8 key to access the CIMC configuration menu.
  •        On the left side of the CIMC window, use the arrow key select the desired options like shared             LOM, provide the ip address with the gateway ip address, vlan information
  •        On the right side of the window select the NIC redundancy like Active-Active or Active Standby.
  •       Press F10 key to save.


After plugging in the Ethernet cable on CIMC port and connecting it with the network, follow these steps to setup CIMC for management of Server remotely.

1.       Before getting on to the next step make sure the IP address which you want to give to the CIMC is ping-able in the network where you want to hookup the UCS.

  •               Open the Browser and type the IP address of the CIMC console.
  •               The default username and password is admin/password.
  •           Login and manage your server. You can power it off/on and make various changes on the               hardware level like bios setting etc.


Cannot run program "C:\\Program": CreateProcess error=2, The system cannot find the file specified

We often find this issue when we login to the UCSM and Click on KVM manager, we see the following error –

Cannot run program "C:\\Program": CreateProcess error=2, The system cannot find the file specified

Even if you try to setup the path file for Java in options given on the top of UCSM but nothing works.

This error happens when you upgrade the latest version of Java from what you had installed earlier – jre-6u45-windows-i586. So the best option is to uninstall the Java from your PC completely and install it the older version given above again. This time when installing it, just change the destination folder while installing Java and that’s it.

For e.g  - Install Java in C:\Java\

Once you do the above step and retry opening KVM via UCSM tool you will see that starts working. 

Cisco Prime infrastructure upgrade procedure from 2.0 to 2.1

Step 1. Check the Version of code already running and please read the release notes carefully.

CPI20/admin# show ver

Cisco Application Deployment Engine OS Release: 2.0
ADE-OS Build Version: 2.0.6.003-px-build
ADE-OS System Architecture: x86_64

Copyright (c) 2005-2010 by Cisco Systems, Inc.
All rights reserved.
Hostname: CPI20


Version information of installed applications
---------------------------------------------

Cisco Prime Infrastructure
------------------------------------------
Version : 2.0.0.0.294  --------------------------<<< Current version


Step 3. Transfer Patch file into the CPI defaultRepo.


CPI20/admin#  copy tftp://10.x.x.x/PI-Upgrade-2.1.0.0.87.tar.gz disk:/defaultRepo


Step 4. Check the defaultRepo.


CPI20/admin# show repository defaultRepo
CPI20-140806-0330.tar.gpg
CPI20-140813-0330.tar.gpg
PI-Upgrade-2.1.0.0.87.tar.gz  -------------------<<< This file should be present in the defaulRepo before starting the Upgrade


Step 5. Stoping NCS Services before upgrade. 


CPI20/admin# ncs stop

Stopping Network Control System...

This may take a few minutes...

Network Control System successfully shutdown.

Plug and Play Gateway is being shut down..... Please wait!!!

Stop of Plug and Play Gateway Completed!!
SAM daemon process id does not exist
DA daemon process id does not exist
DA syslog daemon process id does not exist


Step 7. Initiate the upgrade.
  
CPI20/admin# application upgrade PI-Upgrade-2.1.0.0.87.tar.gz defaultRepo
Save the current ADE-OS running configuration? (yes/no) [yes] ?
Generating configuration...
Saved the ADE-OS running configuration to startup successfully

Please ensure you have a backup of the system before proceeding.
Proceed with the application upgrade ? (yes/no) [yes] ?

DO NOT press ^C while the upgrade is in progress
Aborting upgrade with a ^C may leave the system in a unrecoverable state

Initiating Application Upgrade...
  Stage 1 of 7: Transferring file ...
  -- complete.
  Stage 2 of 7: Unpacking file ...
  -- complete.

*** System will reboot after a successful installation of this package ***
After reboot, please login again into the server to check status

  Stage 3 of 7: Executing pre-install ...

[WARNING] System will reboot after a successful installation of this package (after Stage 7).
After reboot, please login again into the server to check status.
No action required at this time. Continuing with Stage 3.

% Repository not found  -- complete.
  Stage 4 of 7: Upgrading binaries ...
  -- complete.
  Prime Infrastructure Application installation completed
         

  Stage 5 of 7: Retrieving system version ...
  -- complete.
  Stage 6 of 7: Updating Database Schema ...
              : This could take long time based on the existing data size.
                  Stage 1 of 5: Pre Migration Schema Upgrade ...
                                        -- completed at: 2014-08-15 00:21:25.162, Time Taken : 0 hr, 0 min, 17 sec
                  Stage 2 of 5: Schema Upgrade ...
                                : This could take long time based on the existing data size.
                                        -- completed at: 2014-08-15 00:24:56.716, Time Taken : 0 hr, 3 min, 31 sec
                  Stage 3 of 5: Post Migration Schema Upgrade ...
                                        -- completed at: 2014-08-15 00:26:34.534, Time Taken : 0 hr, 1 min, 37 sec
                  Stage 4 of 5: Enabling DB Constraints ...
                                        -- completed at: 2014-08-15 00:34:31.834, Time Taken : 0 hr, 7 min, 56 sec
                  Stage 5 of 5: Finishing Up ...
                                        -- completed at: 2014-08-15 00:34:44.867, Time Taken : 0 hr, 0 min, 13 sec
  -- complete.
  Stage 7 of 7: Re-enabling Database Settings ...
  -- complete.
Upgrade Finished. Server is  restarting . Please wait ..

% This application Install or Upgrade requires reboot, rebooting now...

Broadcast message from root (pts/0) (Fri Aug 15 00:38:13 2014):

The system is going down for reboot NOW!

Application upgrade successful


Checking the Code after upgrading


Step 8. Verify the OS after reboot.
  
CPI20/admin# show version

Cisco Application Deployment Engine OS Release: 2.0
ADE-OS Build Version: 2.0.6.003-px-build
ADE-OS System Architecture: x86_64

Copyright (c) 2005-2010 by Cisco Systems, Inc.
All rights reserved.
Hostname: CPI20


Version information of installed applications
---------------------------------------------

Cisco Prime Infrastructure
------------------------------------------
Version : 2.1.0.0.87   -----------------------------<<<<< Upgraded Version


mac-address bpdu source command

Mac-address bpdu source version 2 is used to use 00:26:0b:xx:xx:x mac address as the source in BPDU by VPC peer.