Cisco gives us the flexibility to select
which AP should advertise what SSIDs. In some scenarios, where we need that our
internal corporate SSID should not be advertised to some areas like cafeteria
or reception. We can design our network to meet such requirement using AP
group.
Follow below procedure to configure AP
group on a controller.
Step1. Go to WIRELESS -> RF PROFILES
-> click NEW to create new RF profiles.

Step2. Create RF profile for 802.11a radio.
Give the name to RF Profile and select the Radio type and press APPLY.

Step3. As you press APPLY, below window
will appear which gives you option to select threshold values and data rates and
press APPLY.

Step4. 802.11a profile is ready and now we
need to create profile for 802.11b/g radio. Click NEW to proceed.

Step 5. Give name and select the radio type
as we have done for 802.11 a radio. Press APPLY.

Step6. Profile edit window will appear as
you press apply. Choose the data rates and threshold values for 9-2.11b/g
radio. Please be careful in enabling the low data rates as it can impact to
overall performance of wireless network.

As per best practice disable the 802.11.b
radio data rates.
Step7. Click WIRELESS-> RF PROFILES to
see the list of profiles created so far.

Step8.Go to WLANs -> ADVANCED and press
ADD GROUP to create new add groups.
By
default there is only one group present i.e DEFAULT GROUP. All the APs which associate
with WLC will be part of this group.

Step9. Give the name and description and
press ADD to proceed.

Step10. As you press ADD, it will add the
group in the AP group list. At this point group has been created but no
customization has been done.
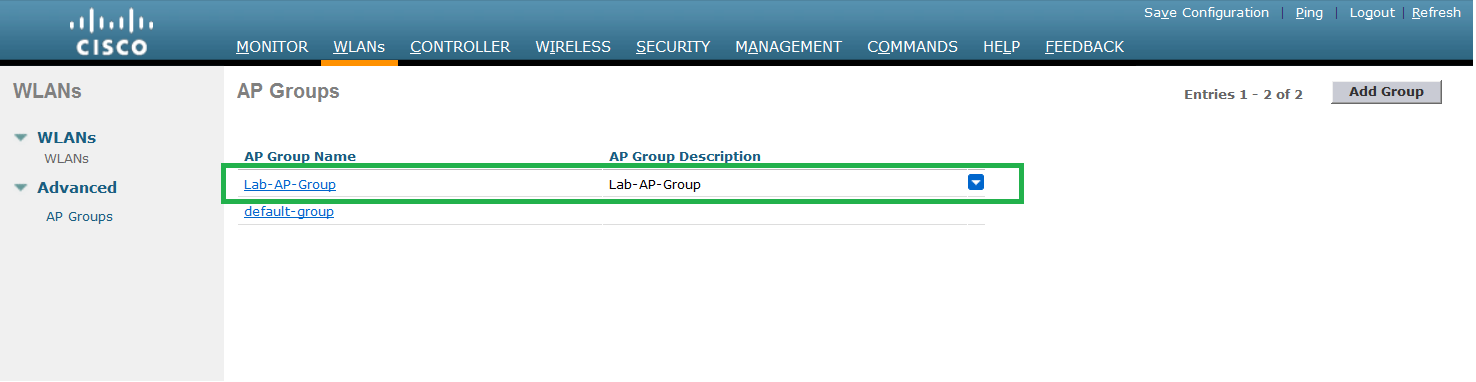
Step11. Click AP group name to start the
customization of the group. Under the GENERAL tab we can edit the description
given in above step.

Step12. By default there is no WLAN select
on the new group created. Press ADD NEW button to select the SSIDs.

Step13. Select the WLAN and its interface.
Interface selected here will overwrite the interface setting done under the
WLAN.
AP1
is part of the AP group “ LAB-AP-GROUP”. And LAB-INTERFACE2 is selected as
interface under WLAN setting. If we select the LAB-interface1 here under AP
group, all the users which will associate to AP1 and connect to SSID”
LAB_WLAN1” will get IP address from interface “LAB-INTERFACE1” not from
LAB-INTERFACE2.
By doing this we have the flexibility to
provide different IP addresses to the users present in different areas.

Step14. As you press enter, WLAN will
become part of this AP group and all the APs under this AP group will start
advertising LAB-wlan1 SSID.
We can add or delete SSID at any point of
time.

Step15. Select the RF profiles created
before.

Step16. Last part is to add APs to AP
group. As mentioned before by default all APs are part of DEFAULT GROUP. Select
the APs which you want to move from default to new AP group. Select the AP and
press ADD APs tab.

Step17. As you press ADD APs, we will get
the below warning which suggest that all the selected APs will reboot in order
to reflect the new settings done under AP GROUP.

Step18. Once the AP boots up, you can see
the AP under the selected AP group.

Step19. You can also remove the AP from an
AP group. It is very similar as we have added the AP in particular group. Just
select the APs and click REMOVE APs.

Step20. You will get the same Warning
again.
Step21. This step is optional where you can
configure the venue group and venue types

Step22. At this point AP group has been
added successfully. Save the configuration.

No comments:
Post a Comment